Azure DevOps Workflow Integration
The Azure DevOps Workflow Integration creates Veracode Azure Pipelines for Veracode Static Analysis, Software Composition Analysis (SCA) and Infrastructure as Code (IaC) scans at the project level. It automates policy scans and pipeline scans for Static Analysis, and agent-based scans for SCA.
Use this guide to install the integration, configure Veracode scans, and view your scan results.
Language support
The Azure DevOps Workflow Integration supports scanning repositories written in the following languages:
| Language | Version | Package manager | Static support | SCA support |
|---|---|---|---|---|
| .NET | .NET 6,7,8,9 | Not applicable | X | X |
| Go | Go 1.22.4 | Not applicable | X | X |
| Java | Java 21 or later | Gradle 8.7 | X | X |
| JavaScript | Not applicable | NPM, Yarn | X | X |
| Kotlin | Not applicable | Not applicable | X | X |
| PHP | 5.2–7.4, 8.0-8.3 | Laravel 5.x-10.x, Zend 1, 2, 3 | X | |
| Python | Python 3 | pip | X | X |
| React Native | Not applicable | NPM, Yarn | X | |
| Scala | Latest | Gradle 8.7 | X | X |
| TypeScript | Not applicable | NPM, Yarn | X | X |
For SCA, see the agent-based scan support matrix for additional support details.
Getting started
To get started, install the integration from the Veracode Platform.
Before you begin
Before you begin, you must have:
-
Enabled the integration for your Veracode account. To enable the integration, contact Veracode Technical Support.
-
The Administrator or Security Lead role.
-
Valid API credentials to run static scans.
-
Valid SCA agent token to run SCA agent-based scans.
-
Created the following two Azure DevOps personal access token (PAT) with the specified access scopes:
Scopes for the Installation PAT
- Code: Read, Write and Manage
- Extensions: Read and Manage
- Project and Team: Read, Write and Manage
Scopes for the Configuration PAT
- Build: Read and Execute
- Code: Read and Write
- Work Items: Read and Write
Install the integration
-
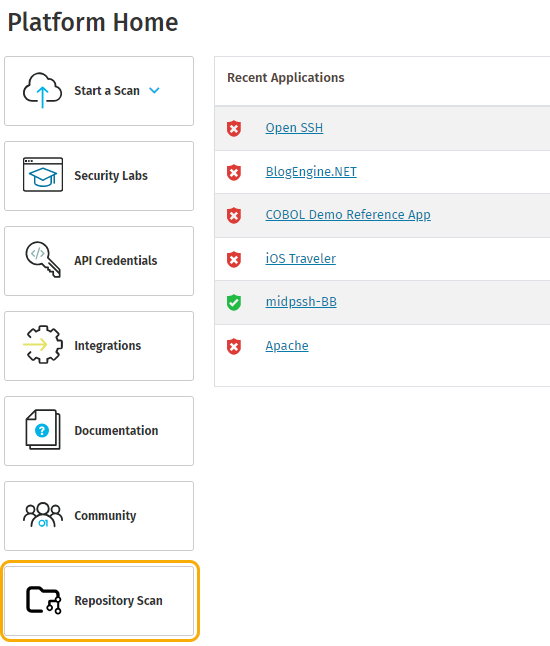
In the Veracode Platform, select Repository Scan from the left menu. The Repository Scanning page opens.
-
Select Azure, and then select Next. The Azure DevOps Service Account Configuration section opens.
-
In ORGANIZATION, enter the name of the Azure DevOps organization.
-
In INSTALLATION PAT and CONFIGURATION PAT, enter the Installation PAT and Configuration PAT mentioned in Getting started.
-
Select the disclaimer, and then select Next. The Configure Veracode API Keys and Secrets section opens.
-
In VERACODE API ID and VERACODE API KEY, enter the API credentials mentioned in Getting started. Optionally, to run SCA agent-based scans, in SRCCLR API TOKEN, enter the SCA Agent Token.
-
Select Install.
If you performed the installation steps correctly, the Successfully installed message is displayed.
On successful installation, Veracode creates the veracode project in the Azure DevOps organization where you installed the Azure DevOps Workflow Integration.
Azure DevOps does not allow the creation of a pipeline in public projects when the pipeline references a repository outside the project. Hence, we are unable to set up the Veracode pipeline in a public project.
Configure scans
In your veracode.yml file, you can configure several options to fit your organization's process, including:
- The types of scans to run
- Which branches to target
- Which Veracode security policy to apply
- Whether the scan is triggered by a push or a pull
See the full list of available configurations.
By default, your veracode.yml file is configured to trigger Static pipeline scans and SCA agent-based scans on any push to any branch.
By default, if analysis_on_platform is true, any code merges into your analysis_branch triggers policy scans, which send results to the Veracode Platform.
The Azure DevOps Workflow Integration only supports jobs that run on Linux agents.
Specify projects or repositories to scan
By default, the Azure DevOps Workflow Integration scans all projects and repositories except for the veracode repository.
Exclude specific projects or repositories
- Open
repo_list.ymlin theveracoderepository. - Under
exclude_repos:, enter the list of projects or repositories you want to exclude. Each repository or project name must be surrounded by single quotes. For example:'project-A/*'or'java_Repo'
Entering a project name as shown will exclude all the repositories within that project.
Include only specific projects of repositories
- Open
repo_list.ymlin theveracoderepository. - Under
include_repos:, enter the list of projects or repositories you want to include. Each project or repository name must be surrounded by single quotes. For example:'project-A/*'or'java_Repo'
Entering a project name as shown will include all the repositories within that project.
veracode.yml reference
The following table describes the properties in the veracode.yml file. You can change these values to configure the integration.
| Value | Description | Default value |
|---|---|---|
push:trigger | If true, triggers a pipeline scan when you commit changes to a branch. | true |
push:branches_to_run | The branches that trigger pipeline scans when you commit changes. If '*', all branches can trigger scans. | '*' |
push:branches_to_exclude | The branches that do not trigger scans. Only applies if branches_to_run is set to '*'. | |
pull_request:trigger | If true, triggers a scan when you perform a pull request. | true |
pull_request:action | Pull request actions that trigger scans. Values are: opened, reopened, edited, synchronize, closed. | opened and synchronize |
pull_request:target_branch | The target branch that triggers scans when you perform pull requests. | default_branch |
analysis_branch | The branch submitted to the Veracode Platform for analysis. | default_branch |
analysis_on_platform | If false, no scans are submitted to the Veracode Platform. If true, scans from the analysis_branch are submitted to the Platform using a new application profile. The name of the profile has this format: ADO/{organization}/{project}/{repository} | false |
policy | The application security policy applied to your scan findings, if a policy is not already assigned to your application profile. | 'Veracode Recommended Medium + SCA' |
profile | The application profile associated with the ADO repository. | The name of the ADO repository |
break_build_policy_findings | If true, the build breaks when findings violate the policy. | true |
break_build_on_error | If true, the build breaks if the scan fails to complete in time or returns an error. | false |
create_work_items | If true, creates Azure work items for Static Analysis findings. | false |
See the following example veracode.yml file:
veracode_static_scan:
  # Please only specify trigger:true for either push event or
  # pull request event. Specifying both will only execute push event.
  # Leaving them both false means this will never run
  push:
    trigger: true
    # Please only specify either branches_to_run or branches_to_exclude
    # Entering both will only execute branches_to_run
    # Leaving them both blank means this will never run
    branches_to_run:
      - '*'
    branches_to_exclude:
  pull_request:
    trigger: false
    action:
      - opened
      - synchronize
    target_branch:
      - default_branch
  # If the analysis_on_platform is set to true,
  # Veracode will save your last scan result, on the default branch, as an application profile with the same name as your scanned repository on the Veracode platform.
  # If the analysis_on_platform is set to false, scan results will not be saved to the Veracode platform.
  analysis_on_platform: false
  # If break_build_policy_findings is set to true, the build will break when findings violate the policy.
  break_build_policy_findings: true
  # If break_build_invalid_policy is set to true, the build will break when the policy name is invalid.
  break_build_invalid_policy: true
  # If the break_build_on_error is set to true, the build will break if the scan failed to complete in time or with an error.
  break_build_on_error: true
  # If the break_build_on_policy_error is set to true, this is the error message that will be displayed if the pipeline scan fails to complete in time or with an error.
  error_message: "Veracode SAST scan faced a problem. Please contact your Veracode administrator for more information. If you are a Veracode administrator, please contact Veracode support."
  policy: 'Veracode Recommended Medium + SCA'
  #If the create_issue is set to true, Azure Work Items will be created for static findings.
  create_work_items: false
veracode_sca_scan:
  # Please only specify trigger:true for either push event or
  # pull request event. Specifying both will only execute push event.
  # Leaving them both false means this will never run
  push:
    trigger: true
    branches_to_run:
      - '*'
    branches_to_exclude:
  pull_request:
    trigger: false
    action:
      - opened
      - synchronize
    target_branch:
      - default_branch
  #If the break_build_on_error is set to true, the build will break if the scan failed to complete, no libraries found, no build system found or on any other error.
  break_build_on_error: true
  #If the break_build_on_policy_error is set to true, this is the error message that will be displayed if the SCA scan fails to complete, no libraries found, no build system found or on any other error.
  error_message: "Veracode SCA scan faced a problem. Please contact your Veracode administrator for more information. If you are a Veracode administrator, please contact Veracode support."
veracode_iac_secrets_scan:
  push:
    trigger: true
    # Please only specify either branches_to_run or branches_to_exclude
    # Entering both will only execute branches_to_run
    # Leaving them both blank means this will never run
    branches_to_run:
      - '*'
    branches_to_exclude:
  pull_request:
    trigger: false
    action:
      - opened
      - synchronize
    target_branch:
      - default_branch
  # If break_build_policy_findings is set to true, the build will break when findings violate the policy.
  break_build_policy_findings: true
  # If the break_build_on_error is set to true, the build will break if the scan failed to complete or with an error, no libraries were found,
  # or no build system was found and the error_message will be displayed.
  break_build_on_error: true
  error_message: "Veracode IAC secrets scan faced a problem. Please contact your Veracode administrator for more information."
Configure integration for individual repositories
Adding a veracode.yml file to individual repositories lets you overwrite specific scan settings defined in your organization's central veracode.yml file.
To overwrite the settings:
-
Add a
veracode.ymlfile to the root of your developer's repository. -
Add the updated configuration to the file. All
veracode.ymlfiles must include the heading and the value that you want to overwrite. For example, thisveracode.ymlfile overwrites thebreak_build_policy_findingsflag so that your builds break when Static Analysis findings violate policy.veracode_static_scan:
break_build_policy_findings: true
profile: <custom profile name>
Verify Scans
Viewing results in Azure DevOps
- Open the project from which you performed the scan.
- From the left pane, select Pipelines, and then select Pipelines. The Pipelines page opens.
- Select Veracode Azure Pipeline. The Veracode Azure Pipeline page opens.
- From the list of scans, select the scan for which you want to view the results. The details of the selected scan is displayed,
- Select Veracode Scans to view the results.
Viewing results in the Veracode Platform
If you set analysis_on_platform to true, you can view scan results in the Veracode Platform.
Static Analysis scans return a list of annotations describing each static flaw and a link to the Veracode Platform where you can view a full report of your results. If an application profile for a scanned repository does not already exist in the Veracode Platform, Veracode automatically creates one using the format for the name of the profile: ADO/{organization}/{project}/{repository}.
For more information on reviewing Static Analysis findings, see Reviewing scan results.
SCA scans return a summary report of your open source security findings as well as a detailed list of libraries, vulnerabilities, and licenses. For more information about SCA findings, see Viewing agent-based scan results.
Update credentials
If your Veracode API credentials or SCA agent token expires, you can update it.
Before you begin
Before you begin, you must have:
-
The Administrator or Security Lead role.
-
Valid API credentials to run static scans.
-
Valid SCA agent token to run SCA agent-based scans.
-
Created an Azure DevOps personal access token (PAT) for configuration with the following access scopes:
Scopes for the Configuration PAT
- Build: Read and Execute
- Code: Read and Write
- Work Items: Read and Write
To complete the task:
- In the Veracode Platform, select Repository Scan from the left menu. The Repository Scanning page opens.
- Select Azure, and then select Next. The Azure DevOps Service Account Configuration section opens.
- Select Update Installation. Then, in ORGANIZATION, select the name of the Azure DevOps organization.
- In CONFIGURATION PAT, enter the configuration PAT.
- Select the disclaimer, and then select Next. The Configure Veracode API Keys and Secrets section opens.
- In VERACODE API ID and VERACODE API KEY, enter the API credentials. Optionally, to run SCA agent-based scans, in SRCCLR API TOKEN, enter the SCA Agent Token.
- Select Update.
Veracode updates the new API credentials or SCA Agent Token in the installed application.
Migrate to Azure DevOps Workflow Integration v2.0.0 or later
Azure DevOps Integration v2.0.0 or later is revised and upgraded compared to the earlier versions.
To complete the task:
Delete service connections
In Azure DevOps, open the Organization that has the Veracode Extension installed.
For the veracode project and every other project in the organization, perform the following steps:
- Select and open the project.
- On the bottom-left side, select the gear icon to open project settings.
- In the left panel, under Pipelines, select Service connections. The Service connections page opens.
- Select Veracode Service Connection.
- In the top-right side, select the more icon (represented by three dots that are aligned vertically), and then select Delete.
Remove key vault
- Open
portal.azure.comand login to your account. - In Azure services, select Key vaults.
- Search and locate the Veracode key vault. The Veracode key vault starts with vc-.
- Select the Veracode key vault.
- For the selected key vault, select Delete. A confirmation pop-up is displayed.
- In the confirmation pop-up, select Delete.
Install the new Azure DevOps Integration
Install Azure DevOps Workflow Integration v2.0.0 or later using the procedure mentioned in this page.